Through integration with DocuSign, you can send and receive documents directly within stg-servisai-teststaging.kinsta.cloud.
User Permissions: Only users with a DocuSign account can use the DocuSign integration.
For help setting up your DocuSign integration in stg-servisai-teststaging.kinsta.cloud, see our DocuSign Integration article.
FAQs
How do I sign in to DocuSign?
See our DocuSign Integration article for instructions on signing in to your account.
How do I authorize my DocuSign account?
See our DocuSign Integration article for instructions on authorizing your account.
Is DocuSign a native integration in stg-servisai-teststaging.kinsta.cloud?
Yes.
How do I send a DocuSign document from within stg-servisai-teststaging.kinsta.cloud?
Create a new DocuSign document, select Print, then choose Send via DocuSign.
How much does DocuSign cost?
Pricing depends on your DocuSign subscription.
How do I set up the stg-servisai-teststaging.kinsta.cloud webhook in my DocuSign account?
See our DocuSign Integration article for instructions.
Create a new DocuSign document
Before sending a DocuSign document, you must first create it in stg-servisai-teststaging.kinsta.cloud.
- Navigate to the app used for the DocuSign integration.
- Click the +App button in the top-right corner.

3. Complete the form with the document details and click Save. This creates a draft that appears in the app used for the DocuSign integration.
For example, when creating a quote, enter details such as Account and Payment Terms, then click Save. The quote will appear in the Quotes app.
After creating a draft, generate a downloadable version of the document before sending it.
Open the draft and click the Print button in the top-right corner.

This generates a downloadable version of the document and a URL for the unsigned version.
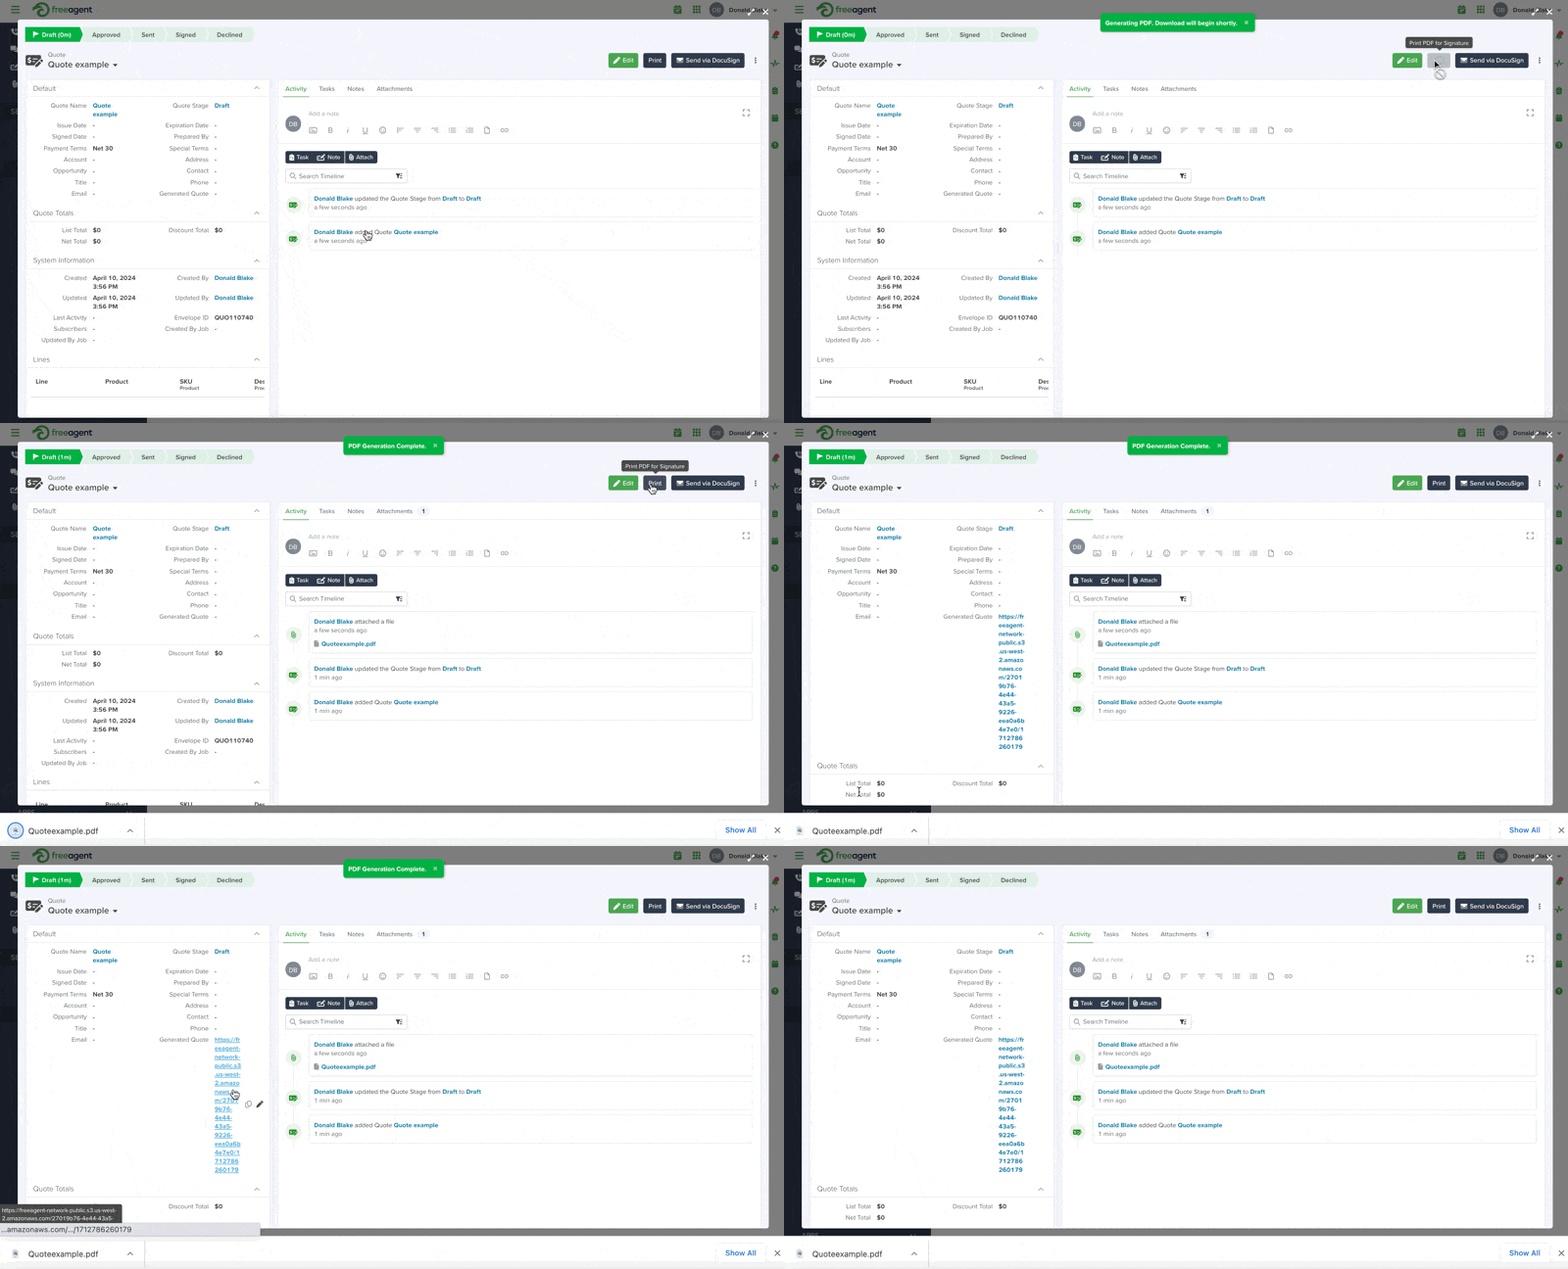
Send via DocuSign
After generating the document URL using Print, click Send via DocuSign to send the document for signature.


